Aero 77 Drone: How to Fly It Safely and Correctly
So you’ve just unboxed your shiny new Aero 77 drone, and you’re itching to get it up in the air. I get it—there’s something incredibly exciting about that first flight. But before you hit that launch button, let’s pump the brakes for a second. Flying a drone isn’t quite like piloting a remote-control toy from your childhood. The Aero 77 is a sophisticated piece of technology, and knowing how to operate it correctly can mean the difference between capturing stunning aerial footage and ending up with an expensive pile of plastic on the ground. Let me walk you through everything you need to know.
Understanding Your Aero 77 Drone: The Basics
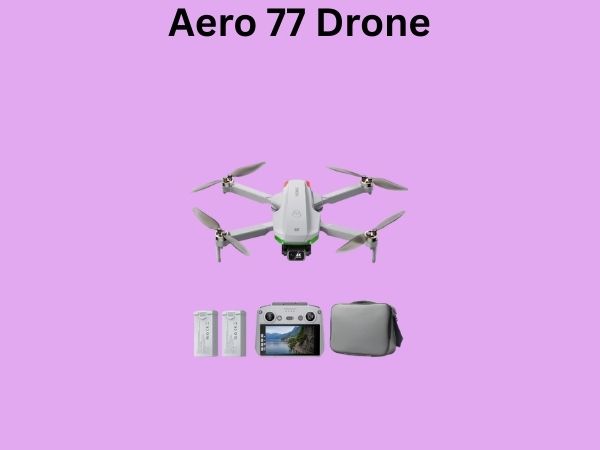
Before we talk about flying, we need to talk about what you’re actually holding. The Aero 77 is a compact yet capable drone that brings professional-grade features to hobbyist pilots. Think of it as the sweet spot between beginner-friendly and feature-rich. It’s got decent battery life, a solid camera, and intuitive controls—but that doesn’t mean you should just wing it on your first flight.
What Makes the Aero 77 Different?
The Aero 77 stands apart from other drones in its class because it offers a remarkable balance of portability and performance. You can toss it in a backpack without feeling like you’re carrying a boulder, yet it delivers stabilization and image quality that would’ve required professional equipment just a few years ago. Understanding this balance is crucial because it influences how you’ll approach flying it.
Pre-Flight Checklist: Don’t Skip This Step
I cannot stress this enough: a thorough pre-flight check is your best friend. It’s like checking your mirrors before merging on the highway—a quick habit that prevents disaster. Every single time you prepare to fly, you should run through this checklist.
Battery Health and Charging
Your drone’s battery is its lifeblood. Before each flight, inspect the battery for any signs of damage, swelling, or discoloration. A puffy battery is a red flag—don’t fly with it. Make sure the battery is fully charged, and ideally, let it sit for a few minutes after charging before use. This allows the cells to stabilize. I always keep a spare battery charged and ready because nothing’s worse than flying for a few minutes and then having to land immediately.
- Check battery percentage before takeoff
- Inspect for physical damage or swelling
- Ensure proper seating in the battery compartment
- Keep spare batteries in a fireproof bag
- Avoid flying with less than 50 percent charge
Propeller Inspection and Installation
Your propellers are what keep your drone in the air, so treat them with respect. Look for cracks, chips, or bends. Even a tiny ding can cause vibration and instability. If you spot damage, swap them out immediately. When installing propellers, make sure they click into place securely. I’ve seen too many propellers fly off mid-flight because someone rushed the installation.
Camera and Gimbal Check
Give your camera lens a gentle wipe with a microfiber cloth. Any dust or smudges will ruin your footage. Check that the gimbal moves freely and responds to controller inputs. If it feels sticky or unresponsive, don’t fly. There’s no point capturing video if it’s going to be blurry or poorly composed.
Getting to Know Your Remote Controller
The controller is your direct line of communication with your drone. Mastering it is absolutely essential. It might look intimidating at first, but once you understand the layout, it becomes second nature.
Controller Layout and Button Functions
The Aero 77’s controller features dual joysticks, a series of buttons, and several dial wheels. The left joystick controls altitude and rotation—push it forward to go up, pull it back to descend, and twist it left or right to rotate the drone. The right joystick handles forward, backward, and lateral movement. Spend some time in simulator mode before your first outdoor flight. Yes, simulators exist, and they’re fantastic for learning without risk.
Understanding the Control Modes
Your Aero 77 likely offers different flight modes. In beginner mode, the drone limits maximum speeds and provides more stability assistance. Sport mode is faster and more responsive but requires more skill. For your first flights, stick with beginner mode. There’s no shame in that—it’s the smart play.
Finding Your Perfect Flying Location
Not all places are created equal when it comes to drone flying. Location matters enormously. You want open space, minimal obstacles, and ideally, good weather. Let me break down what to look for.
Legal Requirements and Airspace
Here’s where things get serious. Most countries have regulations governing recreational drone flight. In the United States, you typically need to register your drone and follow FAA guidelines, which include flying below 400 feet and within visual line of sight. Check your local regulations before you fly—ignorance isn’t an excuse, and fines can be hefty. I always check airspace restrictions using online tools before heading out.
Ideal Outdoor Flying Locations
Look for wide-open spaces like parks, fields, or beaches. Avoid flying near buildings, power lines, trees, or people. Wind is also a consideration—while the Aero 77 can handle moderate breeze, strong winds make control difficult and eat through your battery faster. Early morning or late evening typically offers calmer conditions.
- Parks with open fields
- Beaches or large water bodies
- Empty parking lots away from roads
- Private property with permission
- Areas away from airports and restricted zones
Preparing for Your First Flight
Your first flight is like your first day at a new job—exciting but also nerve-wracking. The good news is that with proper preparation, it’ll go smoothly.
Calibration Steps
Before you take off, your Aero 77 needs to be calibrated. This synchronizes the drone’s internal sensors and ensures it can maintain stable flight. The calibration process is usually straightforward—power on the controller, then the drone, and navigate to the calibration menu in the app. Follow the on-screen instructions carefully. This takes just a few minutes and makes an enormous difference in flight stability.
GPS Lock and Signal Strength
The Aero 77 uses GPS to maintain position and enable return-to-home functionality. Before takeoff, wait for the LED indicators to show that the drone has locked onto GPS satellites. In open sky, this usually takes under a minute. You should see at least ten satellites locked before flying. Check your controller display to confirm signal strength—you want strong bars, not weak ones.
The Takeoff Process: Step by Step
Now comes the moment you’ve been waiting for. But we’re going to do this methodically and safely.
Pre-Takeoff Verification
Stand in front of your drone, away from any obstacles. Check your surroundings one more time. Is the area clear? Are there people nearby? Is the wind reasonable? Only once you’ve confirmed all of this should you proceed. This is your last chance to abort without having to panic.
The Actual Takeoff
Using your controller, slowly push the left joystick upward. The drone should rise smoothly and steadily. Don’t jab the stick—smooth, gradual movements are your friend. You’ll want to get to about ten feet and then pause to assess how the drone is handling. Does it feel stable? Is it drifting? Is the battery performing as expected? If everything looks good, continue ascending, but keep it below thirty feet for these first few moments.
Mastering Flight Control and Movement
Once you’re in the air, it’s time to practice basic maneuvers. But take it slowly—this isn’t a race.
Forward and Lateral Movement
Use the right joystick to move forward. Push it away from you for forward flight, pull it toward you for backward flight, and move it left or right for lateral movement. Start with small, gentle inputs. You’ll be surprised how responsive the Aero 77 is. Sudden, jerky movements consume battery faster and look terrible in footage. Smooth, deliberate movements are the hallmark of professional pilots.
Rotation and Orientation
The left joystick also controls rotation. Twist it to spin your drone clockwise or counterclockwise. This is useful for reorienting your camera or just exploring your surroundings from different angles. Practice maintaining your orientation while also moving—this multitasking is what separates confident pilots from shaky beginners.
Altitude Management
Controlling your height is critical. You don’t want to be creeping along at ground level, but you also shouldn’t be maxing out your altitude on your first flight. Stay between ten and fifty feet for practice. This gives you plenty of room to recover from mistakes while still keeping the drone under control and in visual line of sight.
Using Your Camera and Gimbal
The Aero 77’s camera is one of its biggest selling points, so let’s talk about getting the best footage.
Gimbal Control and Framing
The gimbal dial on your controller adjusts your camera angle. Imagine you’re looking through the camera’s lens—you can tilt up, down, or keep it level. For landscape shots, a level or slightly downward angle works best. For dramatic shots, try angling upward to capture sky. Experiment, but do it while flying relatively stable and at a safe altitude.
Recording Settings and Quality
Check your app before flying to confirm your recording settings. Resolution, frame rate, and bitrate all impact file size and quality. For most situations, 4K at 24 or 30 frames per second strikes a good balance. Start the recording before you begin capturing shots, and remember that the entire flight is an opportunity to get footage—you don’t need to save everything for the last few minutes.
Battery Management During Flight
Battery anxiety is real, and it should be. Your battery is finite, and it depletes faster than you might expect, especially in windy conditions or if you’re constantly moving.
Monitoring Power Levels
Your controller display shows battery percentage. Here’s my rule: never let it drop below 30 percent before beginning your descent. At 30 percent, start heading back to your launch point. At 20 percent, you should be descending. At 10 percent, if you’re not already landing, you’re making a mistake. Wind, aggressive maneuvers, and cold temperatures all drain batteries faster, so be conservative with your estimates.
Return-to-Home Functionality
This is a safety feature you’ll love. If your battery gets critically low, or if you lose signal, the drone will automatically return to the location where it took off and land. It’s not a replacement for careful flying, but it’s a great safety net. Make sure this feature is enabled before every flight.
Landing Your Drone Safely
Landing is often where new pilots make mistakes. Taking off is exciting, but landing requires focus and precision.
Descending Gradually
Use the left joystick to descend slowly. Aim for a descent rate of about two feet per second. This gives you time to adjust if the drone drifts or if the wind pushes it off course. Keep an eye on your landing spot and make sure it’s clear of people and obstacles.
The Final Approach
As you get closer to the ground, slow your descent even more. The last few feet should be crawling-slow. Look for any hazards on the landing spot—sticks, rocks, or uneven terrain can cause the drone to topple. Once it touches down, immediately disarm the motors by moving the left joystick down and to the right, or using the dedicated disarm button on your controller.
Post-Flight Procedures and Maintenance
Your flight isn’t truly over until you’ve completed post-flight checks. These don’t take long, but they ensure your drone stays in good condition.
Immediate Post-Flight Checks
After landing, power everything down. Inspect your drone for any visible damage. Check that all propellers are still secure. Let the battery cool for fifteen minutes before removing it. If you flew near salt water or dusty environments, gently wipe down the drone with a soft cloth.
Storing Your Drone Properly
Store your Aero 77 in a cool, dry place. Remove the battery and store it separately at room temperature. If you’re not flying for more than a month, charge the battery to about 40 percent capacity—this extends its lifespan. Keep propellers off the drone to prevent accidental damage.
Common Mistakes to Avoid
Let me save you some heartache by pointing out mistakes I’ve seen repeatedly.
- Flying near people or in populated areas—never do this
- Ignoring wind conditions and weather forecasts
- Not checking battery health before flights
- Flying without checking local regulations
- Pushing battery to critical levels
- Neglecting propeller maintenance and inspection
- Flying over water without a plan for water recovery
- Ignoring calibration and GPS lock procedures
Advanced Flying Techniques to Explore
Once you’ve mastered the basics, the Aero 77 opens up creative possibilities. These advanced techniques take time to master, so don’t rush.
Smooth Cinematic Movements
Professional drone footage features smooth, flowing movements. Instead of sudden direction changes, anticipate your movements and make gradual joystick adjustments. This creates that buttery-smooth cinematic look everyone admires. Practice flying in circles at various altitudes—it sounds simple, but it teaches you fine motor control.
Hyperlapse and Timelapse Features
Your Aero 77 likely supports timelapse or hyperlapse features. These capture frames at intervals, creating compressed time-lapse videos. They’re fantastic for capturing sunsets, cloud movements, or urban scenes. Experiment with different intervals and durations during your free flights.
Troubleshooting Common Flight Issues
Even experienced pilots encounter problems. Here’s how to handle the most common ones.
Drift During Flight
If your drone drifts in a particular direction without input from your joystick, it might need recalibration. Wind can also cause drift, so first check weather conditions. If drift persists regardless of wind, run a full calibration cycle.
Weak GPS Lock
If your drone struggles to lock onto GPS satellites, you might be in an area with poor satellite visibility—buildings, dense trees, or urban canyons can block signals. Move to a more open location and wait longer for lock to establish.
Reduced Flight Time
Cold temperatures, high wind, and aggressive flying all reduce flight time. This is normal. If you notice a sudden significant decrease, your battery might be aging and needs replacement.