Ascend Drone: How to Fly It for the First Time – A Complete Beginner’s Guide
So you’ve just unboxed your brand new Ascend drone, and now you’re staring at it wondering where on earth you’re supposed to start. Trust me, that feeling is completely normal. Flying a drone for the first time can feel like you’re about to launch a spaceship, but here’s the good news: it’s actually much simpler than you think. In this guide, I’m going to walk you through everything you need to know to get your Ascend drone up in the air safely and confidently.
Understanding Your Ascend Drone: What You’re Actually Holding
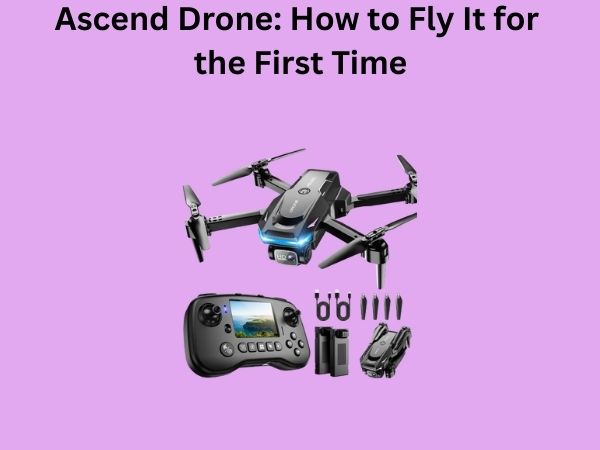
Before we even think about flying, let’s talk about what your Ascend drone actually is. Think of it as a sophisticated flying camera that uses advanced stabilization technology to stay balanced in the air. Your drone has several key components that work together seamlessly, and understanding each one is crucial before takeoff.
The Main Body and Frame
The body of your Ascend drone is the central hub where everything connects. This is essentially the brain of your aerial companion. It houses the flight controller, which is basically a tiny computer that makes thousands of micro-adjustments every second to keep your drone stable. When you hold your Ascend drone in your hands, you’re holding cutting-edge engineering.
The Motors and Propellers
Your Ascend drone features four brushless motors paired with four propellers. These motors spin incredibly fast – we’re talking thousands of rotations per minute. The propellers are what generate the lift that keeps your drone airborne. Here’s a helpful analogy: if the body is your drone’s brain, then the motors and propellers are its muscles. They work together to create thrust and control movement.
The Battery System
The battery is your drone’s lifeblood. A fully charged Ascend drone battery can typically keep your device flying for anywhere between 20 to 30 minutes, depending on conditions and your flying style. Never underestimate the importance of proper battery management – it’s one of the most critical safety factors in drone operation.
The Camera and Gimbal
Most Ascend drones come equipped with a camera mounted on a gimbal, which is essentially a motorized stabilizer. This allows your camera to stay level and smooth even when your drone is moving in multiple directions. It’s like having a professional cinematographer riding on your drone – except it’s just a mechanical system doing all the work.
Pre-Flight Preparation: Don’t Skip This Step
I can’t stress this enough: preparation is everything when it comes to flying your Ascend drone. Rushing this phase is exactly how accidents happen. Let me break down what you need to do before your propellers even spin.
Checking Your Equipment
Start by doing a thorough inspection of your drone and all its components:
- Look for any visible damage, cracks, or loose parts on the body
- Inspect all propellers for chips, cracks, or warping
- Ensure all four propellers are securely attached and spin freely by hand
- Check that your remote controller has fresh batteries and is functioning properly
- Verify that your mobile device is compatible with your Ascend drone’s app
This checklist might seem tedious, but think of it as brushing your teeth – it only takes a few minutes and prevents major problems down the road.
Charging Your Battery Properly
Here’s something many first-time drone pilots don’t realize: how you charge your battery matters significantly. Most Ascend drones come with intelligent batteries that have built-in protection, but you should still follow best practices. Always use the official charger that came with your drone. Charging typically takes between 60 to 90 minutes for a full charge. Never leave your battery plugged in overnight or unattended, and always charge in a cool, dry location.
Updating Your Firmware
Before flying, connect your Ascend drone to the mobile app and check for any available firmware updates. These updates often include important stability improvements, bug fixes, and new features. It’s similar to updating your smartphone – you want to have the latest version for optimal performance and security.
Setting Up Your Remote Controller
Your remote controller is your connection to your drone. Getting it set up correctly is essential for responsive and safe flying.
Pairing Your Controller with Your Drone
The pairing process is straightforward. Here’s what you need to do:
- Turn on your remote controller first
- Power on your Ascend drone
- The LED lights on your drone will blink until it successfully pairs with the controller
- Once paired, the lights will become steady, indicating a stable connection
This pairing process ensures that your controller is communicating exclusively with your drone, preventing interference from other devices.
Adjusting Your Controller Settings
Take time to familiarize yourself with the control sticks and buttons on your remote. The two joysticks control different aspects of flight – typically the left stick handles throttle and rotation, while the right stick controls forward/backward and left/right movement. Different Ascend models may have variations, so consult your manual to be absolutely certain.
Understanding Flight Modes for Beginners
Your Ascend drone likely comes with several flight modes designed for different skill levels and situations. Starting with the right mode makes all the difference.
Stability Mode or Beginner Mode
If your Ascend drone offers a beginner or stability mode, this is where you should start. This mode automatically stabilizes your drone and limits speed and acceleration, making it much more forgiving of control inputs. It’s like having training wheels on your drone – you can focus on learning the basics without worrying about radical movements.
Sport Mode and Advanced Options
Once you’re comfortable with stability mode, you might want to explore sport mode or other advanced modes. These remove some of the automatic stabilization and allow for faster, more agile flying. However, they also require more precise control and practice. Don’t rush into these modes – they’ll still be there once you’ve logged some flight hours.

Choosing Your Flying Location Wisely
Where you choose to fly your Ascend drone for the first time is incredibly important. Making a smart choice here can mean the difference between a successful maiden flight and a frustrating crash.
Finding an Open Space
You need a large, open area with no obstacles. An empty parking lot, a spacious park, or an open field is ideal. Avoid residential areas, busy streets, and any location with trees, buildings, or power lines. Why? Because when you’re learning, your drone might not respond exactly as you expect, and you want plenty of room for error.
Checking Local Regulations
This is crucial and non-negotiable: check your local drone regulations. Many areas require registration, have altitude restrictions, or prohibit flying in certain zones. The last thing you want is to unknowingly break the law. Most regions have online resources that show restricted airspace. Spend five minutes checking – it’s worth it.
Weather Considerations
Wind is your drone’s enemy when you’re learning. Choose a day with calm, light winds – ideally less than 10 miles per hour. Avoid rain, snow, or extremely hot temperatures. Your Ascend drone is designed to handle many conditions, but as a beginner, you want optimal weather to learn proper control techniques.
Your First Flight: Step-by-Step Instructions
Alright, this is it. You’ve prepared, checked everything twice, and you’re standing in your chosen flying location. Let’s get your Ascend drone in the air.
Powering On Your System
Turn on your remote controller first, then power on your drone. Give it a few seconds to initialize and calibrate its sensors. You’ll see the LED lights indicating that the drone is ready for flight. This initialization period is when your drone’s flight computer is checking all systems – think of it as your drone doing a final safety check before takeoff.
Starting Your First Takeoff
Here comes the moment of truth. Gently push the left throttle stick upward. The propellers will spin faster and faster until your drone gently lifts off the ground. I recommend starting with very subtle movements – maybe lifting just a foot or two off the ground. This first hover is about building confidence and understanding how the controls feel.
Once airborne, try to keep your drone hovering in one spot. This is harder than it sounds initially – you’ll likely notice it drifting slightly. That’s completely normal. Make small, gentle adjustments with the joysticks to keep it stable. Think of it like balancing a pencil on your finger – you’re making constant tiny corrections.
Learning Basic Movements
After successfully hovering, practice these basic movements one at a time:
- Moving forward and backward using the right joystick’s forward and backward motion
- Moving left and right using the right joystick’s side-to-side motion
- Rotating left and right using the left joystick’s side-to-side motion
- Ascending and descending using the left joystick’s up and down motion
Do each movement slowly and deliberately. You’re not trying to set any speed records here – you’re building muscle memory and developing an intuitive understanding of how your drone responds to your inputs.
Your First Landing
Landing is arguably more important than takeoff. Many crashes happen during landing because pilots get overconfident. Bring your drone back toward you slowly. Then, very gently reduce throttle while keeping your drone level. Your goal is to bring it down smoothly and let it settle on the ground without bouncing. This might take several attempts to perfect, and that’s perfectly fine.
Common Beginner Mistakes to Avoid
I’ve seen new drone pilots make certain mistakes repeatedly. Learning from others’ errors can save you money and frustration.
Overcontrolling Your Drone
The biggest mistake beginners make is making control inputs that are too large and jerky. Your Ascend drone wants to fly smoothly – it’s designed to do so. When you make big movements with the joysticks, you’re actually fighting against the drone’s natural stability features. Keep your movements smooth and gradual, especially while learning.
Flying Too High Too Quickly
I know the urge to see what your drone can do is strong, but resist it during your first flights. Stick to altitudes under 50 feet until you’re truly comfortable. Flying high means losing the ability to see your drone’s orientation clearly, which is essential for beginners. Build up gradually.
Ignoring Battery Warnings
Your app will give you battery level warnings. When your Ascend drone tells you it’s time to land, listen to it. Flying until your battery completely dies can damage the battery itself and leave you with a drone that won’t come down on its own. Respect the battery warnings – they’re there for a reason.
Flying Away from Visual Line of Sight
Always keep your drone where you can see it with your own eyes. That camera feed on your phone is helpful for framing shots, but it shouldn’t be your only reference. Flying beyond visual line of sight is not only illegal in many places – it’s also incredibly dangerous because you lose situational awareness.
Improving Your Flying Skills
Once you’ve successfully completed a few flights, you’re ready to develop your skills further.
Practice Smooth Movements
The hallmark of an experienced drone pilot is smooth, fluid movements. Practice flying in circles, figure-eights, and orbital patterns around objects. These exercises help you develop the muscle memory needed for truly professional-looking footage.
Experiment with Your Camera
Once you’re confident in the flying itself, start paying attention to what your camera is capturing. Practice tilting the gimbal to adjust your shot. Experiment with different altitudes and angles to find what looks good. This is where flying becomes creative.
Challenge Yourself Gradually
As you improve, gradually introduce more challenging conditions. Fly in slightly breezier weather. Try flying in new environments. Practice flying at different times of day to see how lighting affects your shots. Each new challenge builds your confidence and makes you a better pilot.
Maintenance Tips for Long-Term Performance
Your Ascend drone is an investment, and proper maintenance keeps it performing optimally.
Post-Flight Inspection
After every flight session, do a quick inspection. Check for any dirt or debris on the camera lens and gently wipe it clean with a soft cloth. Look at your propellers for damage. Make sure the battery is stored properly. This routine takes just a few minutes but extends your drone’s lifespan significantly.
Battery Care and Storage
Lithium batteries have specific storage requirements. If you’re not flying for an extended period, store your battery at around 50 percent charge in a cool, dry place. Never store a battery at full charge for weeks at a time – it degrades the cell. Think of it like resting between workouts – your battery needs downtime too.
Safety Considerations Every Pilot Should Know
Safety isn’t optional in drone flying – it’s fundamental.
Respecting Privacy
Always be mindful of other people’s privacy. Don’t fly over private property without permission, and never point your camera directly at someone’s home or private space. Being a responsible pilot means being a responsible neighbor.
Understanding No-Fly Zones
Airports, military installations, and certain government buildings have restricted airspace. Your Ascend drone’s app should alert you if you’re near a restricted zone. Pay attention to these warnings – they exist for legitimate safety and security reasons.
Troubleshooting Common Issues
Sometimes things don’t go exactly as planned. Here are solutions to common problems.
Connection Problems
If your remote controller loses connection with your drone, don’t panic. Most Ascend drones have a “return to home” feature that automatically brings them back to their launch point. Make sure you’re within a reasonable range (typically 300-500 feet) and that there’s no significant interference from nearby WiFi or cellular networks.
Calibration Issues
If your drone seems to drift or won’t hover steadily, it might need compass or IMU calibration. Your mobile app should have a calibration tool. Follow the on-screen instructions carefully – this usually involves rotating your drone in specific patterns while holding it level.
Conclusion
Flying your Ascend drone for the first time is an exciting milestone, and I hope this guide has demystified the process. Remember, every experienced drone pilot started exactly where you are right now – holding a new drone and wondering where to begin. The fact that you’re taking time to learn properly puts you ahead of the curve.
Start with slow, gentle flights in safe locations. Focus on mastering the basics before attempting advanced maneuvers. Respect local regulations and prioritize safety above everything else. Your Ascend drone is capable of amazing things, and with practice and patience, you’ll unlock its full potential. Happy flying!