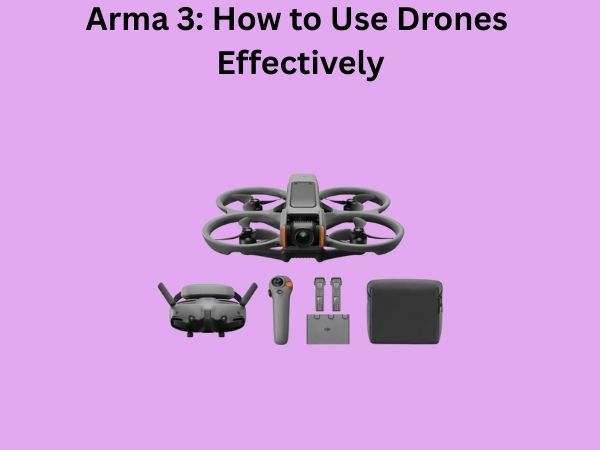
Arma 3: How to Use Drones Effectively – A Complete Guide for Tactical Success
Have you ever wondered what separates a skilled drone operator from someone who crashes their unmanned aircraft within minutes of takeoff? The truth is, mastering drones in Arma 3 isn’t just about pointing and clicking—it’s a strategic art form that requires patience, practice, and a genuine understanding of how these aerial platforms work. Whether you’re playing solo campaigns, engaging in multiplayer matches, or commanding a full tactical squad, knowing how to leverage your drone effectively can be the difference between victory and a crushing defeat.
In this comprehensive guide, I’m going to walk you through everything you need to know about operating drones in Arma 3. From the moment you take control of your first unmanned aerial vehicle (UAV) to executing complex reconnaissance missions that support your entire team, you’ll learn the practical skills that transform you into a lethal asset on the battlefield.
Understanding the Drone Landscape in Arma 3
Let me start by painting a picture of what drones actually are in Arma 3. Think of them as your eyes in the sky—remote-controlled aircraft that let you observe enemy positions without risking your ground troops. But they’re also more than just surveillance tools. Depending on which drone you’re operating, you might have access to weapons systems, thermal imaging, and the ability to communicate directly with your squad.
The Different Types of Drones Available
Arma 3 offers several drone variants, each with distinct characteristics and purposes. Let’s break down the main types you’ll encounter:
- Tactical Drones (like the RQ-20 Puma): These smaller, lighter drones excel at quick reconnaissance missions. They’re nimble, have longer flight times, and can navigate tight spaces around buildings and terrain.
- Quadcopter Systems (like the AL-6 Pelican): These provide excellent stability and can hover in place, making them perfect for sustained observation of specific areas.
- Attack Drones (like the MQ-4A Greyhawk): These heavily armed platforms combine surveillance with firepower, allowing you to acquire targets and engage them without additional air support.
- Heavy Rotary-Wing Drones (like the MQ-12 Falcon): These are essentially flying tanks—slow but powerful, with significant payload capacity and advanced sensor suites.
Each drone has different handling characteristics, fuel consumption rates, and sensor capabilities. Understanding these differences is crucial before you even think about launching a successful mission.
Mastering Basic Drone Controls and Navigation
Once you’ve selected your drone and launched it, you need to feel comfortable with the controls. Think of learning drone controls like learning to drive a car—at first, it feels awkward and unnatural, but muscle memory develops quickly with practice.
The Fundamental Control Scheme
Most drones in Arma 3 follow a similar control layout, though this can be customized in your settings. The WASD keys typically control your forward, backward, and lateral movement, while your mouse handles pitch and yaw. The space bar and Ctrl key manage altitude—up and down respectively.
Here’s what you need to practice first:
- Smooth Banking: Don’t jerk your controls. Gentle, deliberate inputs create stable flight paths that are less likely to cause crashes.
- Altitude Management: Maintain a consistent height above terrain. Too low and you risk collision; too high and your sensors lose clarity.
- Speed Control: Find a comfortable cruising speed. Slower speeds give you better control and longer flight times, but they reduce your responsiveness.
- Camera Panning: Learn to separate your drone’s heading from your camera’s direction. This skill lets you observe areas to your side or rear without turning the entire aircraft.
I recommend spending your first thirty minutes in a simple training mission just flying around without any objectives. Get a feel for how your drone responds to inputs. Does it lag slightly? How quickly does it pitch up? These nuances matter when you’re under pressure during actual combat.
First-Person View Versus Third-Person Perspective
You have two primary viewing modes when operating your drone. The first-person view places you directly in the sensor pod, giving you maximum clarity and immersion but limiting your peripheral awareness. Third-person perspective shows your drone in the environment, which helps you understand your spatial relationship to terrain and targets but can make precise targeting trickier.
Most experienced operators switch between these views fluidly depending on the task. For navigation through crowded airspace or difficult terrain, third-person helps prevent collisions. For target identification and weapon employment, first-person provides superior detail.
Reconnaissance and Surveillance: Your Primary Mission
The backbone of effective drone usage is reconnaissance. You’re gathering intelligence that keeps your team alive and informed. This isn’t glamorous work, but it’s absolutely essential.
Systematic Search Patterns and Area Coverage
Don’t just wander your drone around randomly, hoping to spot enemies. Instead, divide your operational area into sectors and methodically search each one. Imagine you’re searching a building room by room—you wouldn’t jump around randomly. You’d clear each space in order.
Effective search patterns include:
- Grid Search: Divide your area into a grid and fly parallel lines across it, like mowing a lawn. This ensures complete coverage.
- Spiral Search: Start at a central point and spiral outward in expanding circles. Useful when you know enemies are in a general area but not their exact location.
- Perimeter Patrol: Circle the edges of a defined area, maintaining consistent altitude and distance. Perfect for watching base approaches.
- Focus and Fan: Identify key positions (buildings, ridgelines, chokepoints) and systematically examine each one.
As you perform reconnaissance, you’re not just looking—you’re thinking tactically. Where would I position a defensive force? What routes offer cover to attacking troops? How are enemy forces distributed?
Using Thermal Imaging and Advanced Sensors
Most drones in Arma 3 come equipped with thermal imaging capabilities. This feature absolutely changes the game. Thermal vision reveals heat signatures, cutting through fog, darkness, and camouflage that would hide enemies from normal vision.
To use thermal imaging effectively:
- Switch to thermal view when daylight observation fails you
- Remember that vehicles, engines, and humans all generate heat signatures
- Understand that thermal performance degrades in hot environments
- Use thermal scanning to detect recently moved vehicles or personnel
Think of thermal imaging as your secret weapon. An enemy might successfully hide from visual surveillance, but heat doesn’t lie. They’re either there or they’re not, and thermal sensors will tell you which.

Weapon Systems and Tactical Engagement
Not all drones are armed, but those that are provide incredible firepower. An armed drone is essentially a flying tank gun, and using it effectively requires different thinking than reconnaissance.
Understanding Your Drone’s Armament
Attack drones typically carry either hellfire missiles, laser-guided munitions, or rotary cannons. Each weapon type has different characteristics:
- Hellfire Missiles: Fire-and-forget weapons with significant blast radius. They’re devastating against vehicles and building positions but can cause collateral damage.
- Laser-Guided Ordnance: Precision weapons requiring continuous laser designation. You must keep your drone stable and aimed at the target until impact.
- Rotary Cannons: Rapid-fire weapons excellent against soft targets like infantry. They require sustained aim and careful trigger discipline to avoid ammunition waste.
Your weapon choice dictates your tactical approach. Fire-and-forget weapons let you attack and move; laser-guided systems require you to loiter in place. This is a critical consideration when planning your engagement.
Tactical Targeting and Engagement Principles
Before you pull the trigger, ask yourself these questions: Is this target a legitimate military objective? Are there civilians nearby? What’s my escape route if enemy air defense activates? Can I accomplish this mission with lesser firepower?
Effective engagement follows these principles:
- Positive Identification: Always confirm you’re targeting an actual enemy, not a friendly force or civilian
- Collateral Damage Assessment: Verify the area around your target contains only combatants
- Altitude Advantage: Maintain altitude that prevents effective small arms fire from reaching you
- Escape Planning: Know exactly where you’ll fly immediately after firing weapons
- Ammunition Conservation: Don’t waste ordnance. One well-placed shot beats ten scattered rounds
I’ve seen too many operators waste their entire ammunition load on a single target because they panicked. Stay calm, breathe, and place your shots carefully.
Battery Management and Flight Time Optimization
Every drone has a finite amount of fuel or battery power. Run out, and you’re going to have a very bad day. Your $2 million piece of equipment is going to fall from the sky, and you’ll lose all tactical advantage.
Reading and Interpreting Fuel Gauges
Most drones display remaining flight time in your HUD or status panel. Pay attention to this number religiously. Develop a habit of checking it every thirty seconds during operations. When it reaches about twenty percent capacity, you should already be planning your return to base or a resupply point.
Remember that factors affecting flight time include:
- Altitude: Flying higher requires more energy
- Speed: Faster flights consume fuel more quickly
- Weight: Armed drones carry heavier loads and burn fuel faster
- Maneuvers: Aggressive turns and climbs increase consumption
- Wind: Flying against strong headwinds drains battery faster
Become a fuel accountant. Calculate your mission time based on distance, altitude, and speed. If you’re sixty kilometers from base and your drone only has forty minutes of flight time, you need to refuel or risk losing your asset.
Efficient Flight Patterns to Extend Operation Time
Flying efficiently is an art. Think of it like driving a car—smooth acceleration and steady speeds consume less fuel than aggressive driving. In drones, this means:
- Maintain steady cruising speed rather than alternating between fast and slow
- Minimize altitude changes unless tactically necessary
- Plan routes that reduce total distance traveled
- Use autopilot or waypoint systems when appropriate to reduce manual control inputs
- Descend gradually rather than in rapid steps
The most fuel-efficient approach is often the most tactically sound as well. You’ll be in position longer, observe more thoroughly, and have better response times for emergencies.
Communication and Coordinating with Your Squad
A drone isn’t useful if nobody knows what you’re seeing. You’re essentially providing real-time intelligence to your team, and clear communication is essential.
Establishing Effective Communication Protocols
When you spot something important, your squad needs to understand it quickly. Develop a system of callouts that everyone understands. Instead of saying “there’s something at the place I was looking,” be specific: “Enemy squad, approximately fifteen personnel, grid reference 024-567, moving northeast at two meters per second toward friendly positions.”
Good drone operators use:
- Grid References: Always provide exact coordinates so squad members know exactly where to look
- Contact Descriptions: Include vehicle types, troop numbers, and equipment observed
- Movement Vector: Tell people which direction enemies are moving and their speed
- Time Stamps: Indicate when the contact was last confirmed
- Threat Assessment: Help your team understand how urgent the situation is
Practice your callouts during peacetime. Don’t wait until the shooting starts to develop communication patterns. Your squad should be able to interpret your reports without asking for clarification.
Advanced Flying Techniques for Experienced Operators
Once you’ve mastered the basics, you can start implementing more sophisticated tactics that separate casual players from competitive operators.
Precision Hovering and Station-Keeping
Some situations require your drone to maintain an exact position while observing a target. This is harder than it sounds. Wind, uneven terrain, and slight control inputs all create drift. Precision hovering requires gentle, anticipatory inputs.
Practice this in calm conditions first. Find a specific landmark on the ground and try to keep your drone exactly above it for five minutes without drifting. Once you can do that, practice in windy conditions. Feel how wind pushes your drone and compensate with minimal inputs.
Terrain Masking and Low-Level Flying
Flying low—using terrain features to hide your drone from enemy view—is advanced but incredibly effective. You’re essentially using mountains, buildings, and vegetation as cover for your aerial platform.
When terrain masking:
- Approach from directions that keep you behind terrain features
- Use valleys and ridgelines to conceal your approach
- Pop up briefly for observation, then drop back down to cover
- Maintain speed to minimize time exposed to enemy fire
- Keep altitude low enough that you’re below enemy weapon sights
This technique requires practice. You’ll crash a few times learning the limits of your drone’s agility. That’s okay—that’s how you learn.
Tactical Positioning for Maximum Effectiveness
Where you position your drone matters as much as how you operate it. Strategic placement determines what you can see and how quickly you can respond to developing situations.
Optimal Observation Positions
Always position your drone where it provides maximum visibility with minimum exposure. High ground overlooking enemy positions is ideal. A mountain ridge two kilometers from a suspected enemy base lets you observe them while remaining relatively safe from small arms fire.
Consider these positioning principles:
- Sun Position: Keep the sun behind you. Looking into the sun degrades your sensors and makes targets harder to spot
- Elevation Advantage: Higher altitude lets you see further but makes you more visible to enemy air defense
- Distance from Threats: The farther from anti-air weapons, the safer your drone, but your sensor quality decreases
- Support Coverage: Position where your team can actually defend you if enemy
