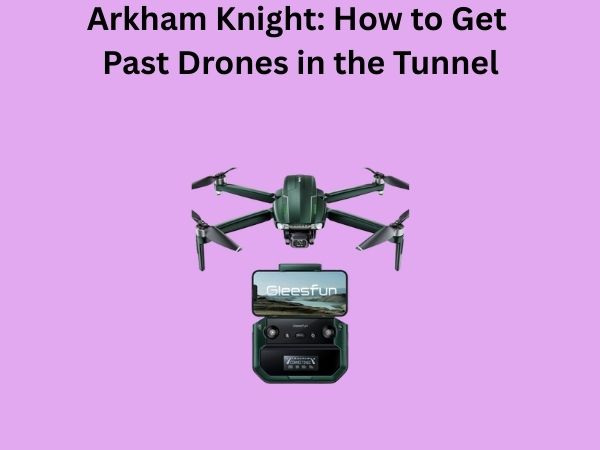
Arkham Knight How to Destroy Drones: A Complete Combat Guide
If you’ve been playing Batman: Arkham Knight, you’ve probably encountered those pesky drones that seem to multiply faster than you can take them down. Trust me, I get it. One minute you’re clearing out a room, and the next thing you know, you’re surrounded by armed robots firing at you from every angle. It’s frustrating, right? But here’s the good news: once you understand the mechanics and develop a solid strategy, destroying drones becomes second nature. Let me walk you through everything you need to know.
Understanding the Drone Threat in Arkham Knight
Before we dive into destruction tactics, let’s talk about what we’re actually dealing with here. Drones in Arkham Knight aren’t just simple obstacles—they’re intelligent, adaptable enemies that require you to think strategically. Think of them like a chess match where your opponent keeps changing the rules. They come in various types, each with different armor plating, weapon systems, and behavioral patterns.
The first time you encounter drones, you might feel overwhelmed. That’s completely normal. These machines are designed to test your combat skills and force you to adapt your approach. The key to success isn’t just about button-mashing; it’s about understanding their weaknesses and exploiting them systematically.
Why Drones Are Particularly Challenging
Drones present a unique challenge compared to human enemies. They don’t get tired, they don’t panic, and they don’t have emotional weaknesses you can exploit. Instead, they rely on predictable patterns and mechanical vulnerabilities. Once you recognize these patterns, you’ll find that drone combat actually becomes more manageable than fighting a group of armed thugs.
The Different Types of Drones You’ll Encounter
Not all drones are created equal, and that’s important to understand. Arkham Knight features several drone variants, each requiring slightly different approaches. Let me break down what you’re likely to face:
Standard Combat Drones
These are your bread and butter. Standard combat drones are equipped with machine guns and basic armor. They’re the most common type you’ll encounter throughout the game. While they’re the least threatening individually, they become dangerous when you’re facing multiple units simultaneously. Their weakness lies in their predictability—they follow set attack patterns that you can learn to counter.
Armored Drones
As the name suggests, these drones feature enhanced plating that makes them tougher to bring down. They take more hits to destroy and often have better defensive positioning. The good news is that their additional armor actually makes them slower and more cumbersome, which you can use to your advantage.
Explosive Drones
These are the ones that keep you on your toes. Explosive drones carry ordnance and will detonate when destroyed or when they get close enough to you. This means you need to be strategic about how and where you destroy them. Triggering one explosion near others can create a chain reaction—which can be a blessing or a curse depending on your situation.
Essential Tools and Gadgets for Drone Destruction
Batman didn’t become the world’s greatest detective by showing up unprepared. Your arsenal is crucial when it comes to taking down drones effectively. Let’s discuss which tools work best:
The Batmobile as Your Secret Weapon
Here’s something many players overlook: the Batmobile is absolutely phenomenal for drone combat. When you’re facing large groups of drones, especially in open areas, calling in the Batmobile transforms the entire battle. Its machine gun and missiles can eliminate drones at range, reducing the immediate pressure on Batman. If you’re struggling with a particular drone encounter, consider whether you can bring the Batmobile into the fight.
EMP Devices
The Electro-Magnetic Pulse gadget is your secret weapon against drones. EMP bursts temporarily disable electronic systems, which means drones become sitting ducks. While they’re stunned, you can close in and perform finishing moves or deploy additional attacks. This is particularly useful when you’re outnumbered.
The Gel Launcher
Explosive gel works wonders on drone armor. By placing gel on vulnerable sections of a drone’s frame and detonating it, you can breach their defenses. This approach is especially effective on armored drones that would otherwise require multiple standard hits to destroy.
Batarangs and Throwing Weapons
Don’t underestimate the simple batarang. While not the most powerful tool, batarangs allow you to damage drones from range and are especially useful for disrupting their attack patterns before they fire on you.
Combat Strategies: The Core Techniques
Having the right gadgets is only half the battle. You need to know when and how to use them. Let me share the core strategies that will transform you from a struggling player into a drone-destroying machine:
The Importance of Spacing and Positioning
Never bunch yourself up in a corner with drones surrounding you. Instead, create distance. Use the environment to your advantage—pillars, walls, and obstacles can block incoming fire. Think of it like playing chess: control the board, and your opponent has fewer options. In drone combat, controlling space means controlling the outcome.
Targeting Priority and Attack Sequencing
When facing multiple drones, don’t just attack the closest one. Instead, prioritize which drones pose the greatest threat. Explosive drones should generally be handled with care, as their detonation could trigger a chain reaction. Armored drones take longer to eliminate, so sometimes it’s smarter to disable them with EMP and come back to finish them later. Standard drones can usually be handled quickly if you create distance from the heavier units.
The Counter and Dodge Pattern
Drones fire in volleys. Once you recognize their attack rhythm, you can predict when incoming fire is coming. This is where your counter and dodge moves become absolutely critical. Timing your dodges to slip between drone attacks creates openings for you to strike back. It’s like a dance—once you learn the steps, everything flows naturally.
Step-by-Step Drone Destruction Technique
Now let’s get into the actual mechanics of how to destroy drones efficiently:
Phase One: Assessment and Preparation
When you enter a room with drones, take a moment to assess the situation. How many drones are there? What types? What’s the layout of the space? This 10-second evaluation can make the difference between victory and defeat. Once you’ve assessed, position yourself with your back to a wall or obstacle so enemies can’t flank you from behind.
Phase Two: Initial Engagement
Start by using ranged attacks—batarangs or the Batmobile if available—to whittle down drone numbers from a distance. Your goal is to reduce the enemy count before closing in for melee combat. This prevents you from being overwhelmed.
Phase Three: Up-Close Combat
Once you’ve reduced the threat level, engage directly. Use your counter moves religiously. The moment a drone’s attack indicator appears, counter it. This not only prevents damage but also stuns the drone briefly, creating an opening for you to land hits or deploy gadgets.
Phase Four: Gadget Deployment
With drones stunned or in close range, this is when you deploy your heavy-hitting gadgets. Use explosive gel on armored drones, EMP on groups of standard drones, or switch to the Batmobile for additional support. The key is timing—deploy gadgets when you have the breathing room to do so safely.
Phase Five: Finishing Moves
Once a drone is sufficiently damaged, you’ll be able to perform finishing moves. These are quick, satisfying animations that eliminate the drone completely. Use them to build your combo multiplier, which increases your damage output and makes subsequent drones easier to defeat.

Advanced Tactics for Difficult Encounters
Some encounters are genuinely brutal. You might find yourself facing a dozen drones with multiple armor types and limited resources. Here’s how to handle those nightmare scenarios:
Crowd Control Through Strategic Elimination
Don’t try to damage all drones equally. Instead, completely eliminate a few drones quickly to reduce the enemy count. Going from fighting twelve drones to fighting nine makes a massive psychological and practical difference. Your goal is to reduce the pressure systematically rather than spreading damage across the board.
Using Environmental Hazards
Some combat rooms feature environmental hazards—steam vents, electrical panels, or explosive barrels. If you can lure drones into these areas or trigger them at the right moment, you can deal massive damage without using your limited gadget ammunition. It’s not always possible, but when it is, it’s incredibly effective.
The Three-Count Reset Strategy
If you’re taking too much damage and feel overwhelmed, sometimes it’s better to break engagement, heal up if possible, and restart. The game doesn’t penalize you for tactical withdrawals. Sometimes the smartest move is retreating to an advantageous position and regrouping.
Drone Weakness Analysis
Every enemy, no matter how advanced, has weaknesses. Here’s what drones are vulnerable to:
- Electromagnetic Attacks: EMP gadgets temporarily disable all drone systems, leaving them defenseless
- Explosive Force: Concentrated explosions can breach armor and cause critical damage
- Predictable Patterns: Drones follow set attack sequences, which you can exploit
- Ranged Pressure: Being attacked from distance forces drones into evasive patterns that create openings
- Energy Depletion: Extended combat drains a drone’s power reserves, making them less effective over time
Common Mistakes Players Make
I’ve watched countless players struggle with drones because they repeat the same mistakes. Let me help you avoid them:
Mistake One: Ignoring the Counter System
Batman’s counter system is absolutely overpowered against drones if you use it correctly. Yet many players ignore it and just try to dodge everything. That’s like having a shield and choosing not to use it. Practice countering—it’s the foundation of successful drone combat.
Mistake Two: Wasting Gadgets Early
Your gadgets are limited resources. Using your EMP on the first group of three drones means you don’t have it for the boss fight later. Budget your gadgets carefully and use them strategically rather than recklessly.
Mistake Three: Fighting Where the Drones Choose
Drones want you in open areas where they have clear sightlines. You want to fight in tight spaces where their numbers matter less. Always move the battle to your advantage if possible.
Mistake Four: Neglecting Health Management
Don’t wait until you’re near death to use healing items. Maintain your health proactively. It’s better to use a healing item when you’re at 50% health than to wait until you’re desperate.
Tips for Specific Drone Encounters
Different scenarios require different approaches. Here are some context-specific tips:
Enclosed Spaces with Limited Movement
In tight quarters, EMP gadgets become your best friend because drones can’t spread out or flank you effectively. Use the narrow space to your advantage by controlling a single chokepoint.
Open Areas with Multiple Sightlines
In open spaces, mobility is crucial. Use the Batmobile for support, and focus on creating distance between yourself and enemy fire. Use cover aggressively.
Mixed Enemy Groups
When drones fight alongside human enemies, handle the drones first. Human enemies are generally less dangerous, so eliminating the drones reduces the overall threat level and simplifies the encounter.
Practice Drills to Improve Your Skills
Want to get genuinely better at drone combat? Try these practice exercises:
- Counter Only Drill: Fight drones without using any attacks—only counters. This forces you to master timing
- No Gadget Challenge: Complete a drone encounter using only your fists and basic equipment
- Speed Run: Try to defeat a drone group as quickly as possible, forcing you to be efficient
- Limited Health Challenge: Fight with reduced health bars to practice defensive positioning
Gear and Upgrade Recommendations
Your equipment upgrades matter. Prioritize upgrades that improve drone combat effectiveness:
First, invest in armor upgrades. Taking less damage fundamentally changes how you can approach drone encounters. Second, upgrade your gadgets—increased EMP radius or faster explosive gel deployment makes a real difference. Finally, prioritize suit upgrades that enhance your melee damage output, allowing you to destroy drones faster.
Conclusion
Destroying drones in Batman: Arkham Knight isn’t about being the fastest or the strongest—it’s about being smart, strategic, and patient. You need to understand your enemies, leverage your tools effectively, and control the battlefield. The techniques we’ve discussed throughout this guide will transform you from frustrated to confident. Remember to assess situations before engaging, prioritize your targets, use your counter system religiously, and manage your resources wisely. Start with the basics, practice these fundamentals until they become second nature, and gradually work up to more complex encounters. Before you know it, you’ll be clearing drone rooms that once seemed impossible. Now get out there and show those machines what the Dark Knight is made of.
Frequently Asked Questions About Destroying Drones in Arkham Knight
What’s the fastest way to destroy a single drone?
The fastest method is using explosive gel if the drone is in a stationary position. Position yourself at range, place gel on the drone’s body, and detonate. This eliminates most drones in a single move. If you can’t use explosives, your counter-based combo system is fastest—counter attacks, build combos, and execute finishing moves. Each counter creates a brief opening for uninterrupted hits.
Should I use the Batmobile in every drone encounter?
Not necessarily every encounter, but definitely when available and effective. The Batmobile is most useful when you’re facing large groups of drones in open areas. For small, tight encounters, bringing in the Batmobile might actually complicate things. Use it strategically rather than reflexively.
Why do some drones seem immune to my attacks?
Heavily armored drones require different approaches. Standard melee attacks are inefficient against maximum armor. Instead, use explosive gel to breach their armor, EMP to disable them, or focus on gadgets and ranged attacks. Once their armor is compromised, normal attacks become effective again.
How many times should I counter before attacking?
You don’t need to counter multiple times before attacking—in fact, counter into an attack immediately. The counter system both protects you and creates an opening. As soon as you counter an attack, follow it up with strikes before the drone recovers. It’s a flow state where defending and attacking are seamlessly connected.
What’s the best gadget for beginners learning drone combat?
The EMP gadget